
Introduction
This guide will show you how to setup a new project using Ember and Laravel, JSON-API and token based authentication. The deployed version of your application will be a Laravel backend which serves up the Ember frontend using a Laravel route.
Software
At the time of writing the tools used are:
- Laravel 5.1 (LTS)
- Ember 2.4.1 (LTS) with Ember-CLI 2.4.1
- Dingo API 1.0.0 (beta)
- Tymon jwt-auth 0.5.9
- ember-simple-auth 1.0.1
- ember-simple-auth-token 1.0.0
Prerequisites
- Ember CLI 2.4.1
- Laravel Requirements
- Composer
- Git or any other VCS that you prefer
Initial Setup
The basic project structure will be a backend directory for the Laravel part, and a frontend directory for Ember.
#create a directory called sample-project
mkdir sample-project
# go into the sample-project directory
cd sample-project
# make the project a Git project
git init .
For .gitignore files I prefer using gitignore.io which creates a .gitignore file for the software that you use. Just generate one that matches your needs, I use the following: OSX, Composer, Laravel, PHPStorm, Vagrant but you can customise for your own needs. Just generate and add this to the root of your sample project e.g.
wget "https://www.gitignore.io/api/osx%2Ccomposer%2Claravel%2Cphpstorm%2Cvagrant" -O .gitignore
NOTE: I don’t like that gitignore’s Laravel setup excludes the full storage directory – which can cause problems during deployment. Instead I manually remove the following line from the .gitignore file and use the .gitignore files already provided by Laravel in each storage subdirectory.
storage/
It also selectively excludes certain PHPStorm files (.idea) whereas I prefer ignoring the full .idea directory:
# Add .idea to the .gitignore file
echo ".idea" >> .gitignore
Laravel (Backend) Setup
I prefer to use the LTS releases of Laravel, so will be installing version 5.1
# Install Laravel 5.1 to a directory called backend
composer create-project laravel/laravel backend "5.1.*"
# Switch into the backend (Laravel) directory
cd backend
Your current project structure should now look like this:
# Delete the .git directory from backend as we already have our Git project setup in the project root
# Make sure you are in the backend directory (don't delete .git in your project root directory)
rm -Rf .git
# Add all the Laravel files and commit the project
git add .
git commit -a -m "Added Laravel 5.1"
Add your database configuration to the .env file by updating the following lines:
DB_HOST=localhost
DB_DATABASE=homestead
DB_USERNAME=homestead
DB_PASSWORD=secret
# Migrate the default Laravel tables
php artisan migrate
Install Dingo API
The Dingo API package has comprehensive documentation available but for the sake of this guide I’ll go through a quick setup. I highly recommend you read through the documentation and configuration so that you can make your API work appropriately for you.
# Install the Dingo API package
composer require dingo/api:1.0.x@dev
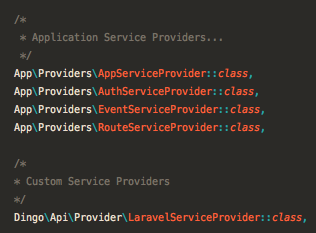
Add the Dingo API service provider class to the list of Laravel providers (config/app.php)
Dingo\Api\Provider\LaravelServiceProvider::class,
Publish the Dingo API config file
php artisan vendor:publish --provider="Dingo\Api\Provider\LaravelServiceProvider"
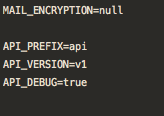
Add some basic config options to the .env file
API_PREFIX=api
API_VERSION=v1
API_DEBUG=true
# Git commit the changes (Dingo API Installation)
git add .
git commit -a -m "Installed Dingo API"
Install Tymon JWT-Auth
The JWT-Auth token package is only required if JWT (JSON Web Tokens) is an authentication method that you plan to use in your application. This tutorials assuems that you will be using it, but if you’re not then just skip the appropriate parts.
This package also has great documentation available that you’re advised to read through to make sure you set it up in a way that works for you but the few steps below will get you started
# Install Tymon JWT-Auth
composer require tymon/jwt-auth
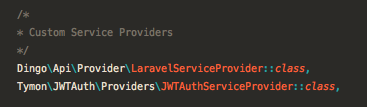
Add the JWTAuth Service provider to the providers section in config/app.php:
Tymon\JWTAuth\Providers\JWTAuthServiceProvider::class,
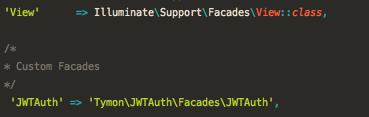
Add the JWTAuth facade to the aliases section in config/app.php
'JWTAuth' => 'Tymon\JWTAuth\Facades\JWTAuth',
# Publish the JWTAuth config file
php artisan vendor:publish --provider="Tymon\JWTAuth\Providers\JWTAuthServiceProvider"
# Generate JWT Auth secret key
php artisan jwt:generate
Now that the JWT Auth and API packages are installed, we need to configure the API to use JWT for it’s authentication method. Luckily this can be done very easily in the API config file located in config/api.php
Find the following section:
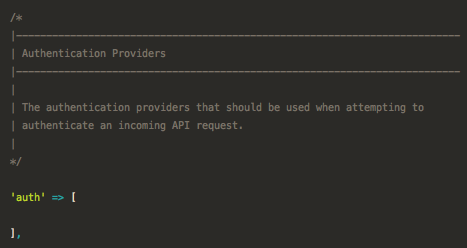
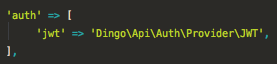
And add the following within the auth array:
'jwt' => 'Dingo\Api\Auth\Provider\JWT',
git add .
git commit -a -m "JWT auth package installed"
Using JSON API
JSON API is a standard for APIs that use JSON data and has been the default adapter setting in Ember since version 2.0. In order to make the API return JSON API formatted data we just need to configure Dingo API to use the JsonApiSerializer that it comes bundled with.
in app/Providers/AppServiceProvider.php
First add the following use statements:
use Dingo\Api\Transformer\Adapter\Fractal;
use Illuminate\Support\ServiceProvider;
use League\Fractal\Manager;
use League\Fractal\Serializer\JsonApiSerializer;
Add the following to the boot() method within this service provider:
// API uses JSON API
$this->app['Dingo\Api\Transformer\Factory']->setAdapter(function ($app) {
     $fractal = new Manager();
     $fractal->setSerializer(new JsonApiSerializer());
     return new Fractal($fractal);
});

git add .
git commit -a -m "API uses JSON API serializer"
Setting up the Laravel Router
Below you’ll find the template of the Laravel routes file (app/Http/routes.php) that which you can download from my laravel-ember-starter repo
<?php

/*
|--------------------------------------------------------------------------
| Application Routes
|--------------------------------------------------------------------------
|
| Here is where you can register all of the routes for an application.
| It is a breeze. Simply tell Lumen the URIs it should respond to
| and give it the Closure to call when that URI is requested.
|
*/

// API Routes come first
$api = app('Dingo\Api\Routing\Router');
$api->version('v1',function($api){
    header('Access-Control-Allow-Origin: http://localhost:4200');
    header('Access-Control-Allow-Headers: Origin, Content-Type, Authorization');
    header('Access-Control-Allow-Methods: POST, GET, OPTIONS, PUT, PATCH, DELETE');

    // API
    $api->group(['namespace'=>'App\Http\Controllers\Api'],function($api){
        // Auth
        $api->post('auth/login','Auth\AuthController@postLogin');
        $api->post('auth/token-refresh','Auth\AuthController@refreshToken');
        $api->post('users','Auth\UsersController@store');

        // Protected methods (require auth)
        $api->group(['middleware'=>'api.auth'],function($api){

        });

        // Public methods

    });
});

// Catchall - Displays Ember app
Route::any('{catchall}',function(){
    return view('index');
})->where('catchall', '(.*)');
Few notes on the above routes.php file:
http://localhost:4200is the default address when using Ember serve to develop your app- All the API requests are handled first
- All non-API requests are caught by the final catch all rule, which returns the index view
- The index view will return the Ember application
- I prefer to use App\Http\Controllers\Api as my root namespace for API controllers, but you can amend this as necessary
Authentication
As you can see in the above routes file, we have two Authentication routes:
![]()
To implement these methods we’ll first need to create the app/Http/Controllers/Api/Auth/AuthController.php file and setup the authentication methods
<?php
namespace app\Http\Controllers\Api\Auth;


use App\Http\Controllers\Controller;
use Dingo\Api\Http\Request;
use Dingo\Api\Routing\Helpers;
use Symfony\Component\HttpKernel\Exception\HttpException;
use Symfony\Component\HttpKernel\Exception\UnauthorizedHttpException;
use Tymon\JWTAuth\Exceptions\JWTException;
use Tymon\JWTAuth\Exceptions\TokenInvalidException;

class AuthController extends Controller
{

    use Helpers;

    public function postLogin(Request $request)
    {
        // grab credentials from the request
        $credentials = $request->only('email', 'password');

        try {
            // attempt to verify the credentials and create a token for the user
            if (! $token = \JWTAuth::attempt($credentials)) {
                throw new UnauthorizedHttpException("Email address / password do not match");
            }
        } catch (JWTException $e) {
            // something went wrong whilst attempting to encode the token
            throw new HttpException("Unable to login");
        }

        // all good so return the token
        return $this->response->array(compact('token'));
    }

    public function refreshToken(Request $request)
    {
        $token  =   $request->get('token');
        if(!$token)
        {
            return $this->response->errorBadRequest('Token not provided');
        }
        try {
            $token  =   \JWTAuth::refresh($token);
        }
        catch(TokenInvalidException $e) {
            return $this->response->errorForbidden('Invalid token provided');
        }
        return $this->response->array(compact('token'));
    }

}
The login method will get the email and password from the request, try to authenticate and then return errors on failure (Dingo handles exceptions) and a token on success
refreshToken gets the token from the request, and then attempts to refresh the token (generating a new token).
Full contents of the controller including traits and use statements can be downloaded from my laravel-ember-starter repo
git add .
git commit -a -m "Added Authentication methods"
Laravel Finishing Touches
In app/Http/Kernel.php comment out or delete the line:
\App\Http\Middleware\VerifyCsrfToken::class,
If you want to create a test user (change the credentials to whatever you want) to test your authentication
# Create a dummy user
php artisan tinker
App\User::create(['email'=>'email@domain.com','password'=>bcrypt('password')]);
exit
git add .
git commit -a -m "Laravel Setup complete"
Laravel Summary
That’s it with the Laravel setup for now. Whilst there’s quite a few steps the idea is quite simple:
- Install Laravel
- Add API support
- Add JWT setup
- Setup the API to use JSON API
- Add authentication methods
Ember Frontend Setup
Now that the API setup is ready we focus on creating a new Ember project to use as the frontend.
Initialize Project with Ember-CLI
# go back up to the project root directory
cd ..
# create a new Ember project called 'frontend'
ember new frontend
# go into the 'frontend' directory
cd frontend
# delete the .git folder created by Ember (in the frontend directory - don't delete the one in your project root)
rm -Rf .git
# add the Ember project to our Git repo
git add .
git commit -a -m "Added Ember project"
When developing applications I use Vagrant for serving the Laravel app, and the Ember-CLI built in server. This gives me two URLs:
http://myapp.local– which goes to the Laravel application running on Vagranthttp://localhost:4200– the default URL for the Ember application using ember serve
For the application to work, we need to make the Ember application aware of the Laravel URL so that we can make API requests to it. To do this I specify the API url as a config setting in Ember. In config/environment.js add the following line (replace the URL with your Laravel application URL):
ENV.apiBaseUrl = 'http://sample-project.local';
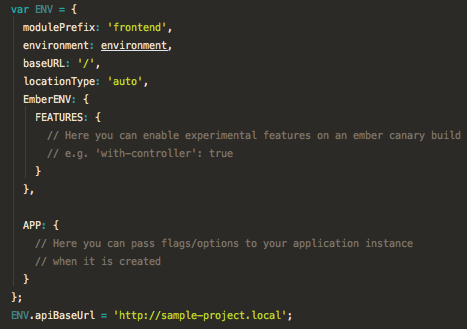
You’ll notice in that config file that there’s sections where you can specify environment specific settings (e.g. development and production) which means you can set the above option separately for each environment.
Add Authentication Packages
For authentication with Ember we’ll use Ember Simple Auth base package, with Ember Simple Auth Token since we need JWT support.
# Install Ember Simple Auth
ember install ember-simple-auth
# Install Ember Simple Auth Token
ember install ember-simple-auth-token
Then to configure the Auth packages add the following to config/environment.js:
ENV['ember-simple-auth'] = {
  authorizer: 'authorizer:token'
};
ENV['ember-simple-auth-token'] = {
  refreshAccessTokens: true,
  timeFactor: 1000,
  refreshLeeway: 300,
  serverTokenEndpoint: ENV.apiBaseUrl + '/api/auth/login',
  serverTokenRefreshEndpoint: ENV.apiBaseUrl + '/api/auth/token-refresh',
  identificationField: 'email'
};
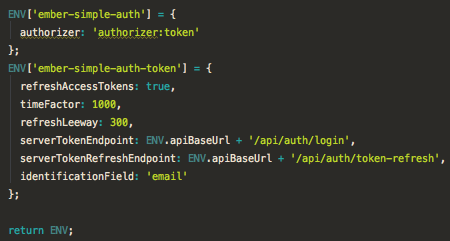
You can update the options to suit your requirements if necessary
Login
# generate the login route
ember g route login
Create a simple form in the login template app/templates/login.hbs
{{#if errorMessage}}
    {{errorMessage}}
{{/if}}
<form {{action 'authenticate' on='submit'}}>
  <label for="identification">Login</label>
  {{input id='identification' placeholder='Enter Login' value=identification}}
  <label for="password">Password</label>
  {{input id='password' placeholder='Enter Password' type='password' value=password}}
  <button type="submit">Login</button>
</form>
Make the route available only when the user isn’t logged in, and clear the errors when the user goes to a different page by editing the login route file in app/routes/login.js
import Ember from 'ember';
import UnauthenticatedRouteMixin from 'ember-simple-auth/mixins/unauthenticated-route-mixin';

export default Ember.Route.extend(UnauthenticatedRouteMixin,{
    resetController(controller,isExiting)
    {
        if(isExiting){
            controller.set('errorMessage', '');
        }
    }
});
# Create the login controller
ember generate controller login
Handle authentication attempts in the login controller app/controllers/login.js
import Ember from 'ember';

export default Ember.Controller.extend({
  session: Ember.inject.service(),

  actions: {
    authenticate: function() {
      var credentials = this.getProperties('identification', 'password'),
        authenticator = 'authenticator:jwt';

      this.get('session').authenticate(authenticator, credentials).catch((message) => {
        this.set('errorMessage', message.message);
      });
    }
  }
});
Authenticating API Requests
At this point authentication should be working properly, but we still need to configure Ember to send the token in API requests to access protected endpoints. In order to do this we’ll extend the Ember JSON API adapter and configure it to use the Token Authorizer from Ember Simple Auth Token.
# Create the adapter
ember g adapter application
Update the adapter in app/adapters/application.js
import DS from 'ember-data';
import ENV from 'frontend/config/environment';
import DataAdapterMixin from 'ember-simple-auth/mixins/data-adapter-mixin';

export default DS.JSONAPIAdapter.extend(DataAdapterMixin,{
	host: ENV.apiBaseUrl,
	namespace:'api',
	authorizer: 'authorizer:token',
	handleResponse: function(status, headers, payload){
		// If the response is 422 (Unprocessable Entity) then format the errors into JSONAPI format
		if(status === 422 && payload.errors){
			let error_response	=	[];
			for(var key in payload.errors) {
				error_response.push({id:key,title:payload.errors[key][0]});
			}
			return new DS.InvalidError(error_response);
		}
		return this._super(...arguments);
	}
});
As well as setting the authorizer the above adapter also sets the following options:
host– tells the adapter to make all requests to the apiBaseUrl that we specified in the confignamespace– Use the ‘api’ namespace for all requests (to match all the Laravel route structure)handleResponse– format the errors for 422 errors
Logout
Logout is an action that can be accessed from any page with the application, so we’ll handle the logout action in the application controller.
# create application controller
ember g controller application
Create the invalidateSession method in the application controller: app/controllers/application.js
import Ember from 'ember';

export default Ember.Controller.extend({
	session: Ember.inject.service('session'),
	actions: {
		invalidateSession() {
			this.get('session').invalidate();
		}
	}
});
Of course you’ll want to add the logout link in your application template app/templates/application.hbs
<ul>
    {{#if session.isAuthenticated}}
        <li><a {{action 'invalidateSession'}}>Logout</a></li>
    {{else}}
        <li>{{#link-to 'login'}}Login{{/link-to}}</li>
        <li>{{#link-to 'register'}}Register{{/link-to}}</li>
    {{/if}}
</ul>
# git commit
git add .
git commit -a -m "Ember authentication implemented"
Registration
If your application requires user registration then use the steps below, and if you don’t need registration just comment out the line from backend/app/Http/routes.php:
$api->post('users','Auth\UsersController@store');
Backend Setup
We’ve already defined a route for creating new users in the backend/app/Http/routes.php file:
$api->post('users','Auth\UsersController@store');
The next step is to create a new controller with the Laravel project directory:
# Switch to the 'backend' directory
cd ../backend
Create app/Http/Controllers/Api/Auth/UsersController.php and populate the store action:
<?php
/**
 * Created by PhpStorm.
 * User: ash
 * Date: 02/03/2016
 * Time: 10:06
 */

namespace app\Http\Controllers\Api\Auth;


use App\Http\Controllers\Controller;
use App\User;
use Dingo\Api\Exception\StoreResourceFailedException;
use Dingo\Api\Http\Request;
use Dingo\Api\Routing\Helpers;

class UsersController extends Controller
{
    use Helpers;

    public function store(Request $request)
    {
        $data   =   $request->get('data')['attributes'];
        $validator  =   \Validator::make($data,[
            'email'     =>  'required|email|unique:users',
            'password'  =>  'required'
        ]);
        if($validator->fails()){
            throw new StoreResourceFailedException('Invalid user data',$validator->errors());
        }
        User::create(['email'=>$data['email'],'password'=>bcrypt($data['password'])]);
        return $this->response->noContent();
    }
}
The submitted data is validated, and detailed errors returned if validation fails. Otherwise we send back a success response with no content, which the Ember app will use to notify the user that registration is successful and that they can now login
The next step is to create a registration route and a user model:
# Switch back to the 'frontend' directory
cd ../frontend
ember g route register
ember g model user email:string password:string
Setup the registration template in app/templates/register.hbs
{{#if registered}}
    <h1>Registered!</h1>
    <p>Registration was successful.  You can {{link-to 'now login' 'login'}} with the credentials you registered with.</p>
{{else}}
{{#if errorMessage}}
    {{errorMessage}}
{{/if}}
<form {{action 'register' on='submit'}}>
    <p>Create a New Account</p>
    <label for="identification">Email</label>
    {{input id='identification' placeholder='Email Address' value=model.email type='email'}}
    <label for="password">Password</label>
    {{input id='password' placeholder='Enter Password' type='password' value=model.password}}
    <button type="submit">Register</button>
</form>
{{/if}}
The registration route needs a couple of updates to make it accessible to unauthenticated users, and to clear the error messages when the user leaves the page so update app/routes/register.js
import Ember from 'ember';
import UnauthenticatedRouteMixin from 'ember-simple-auth/mixins/unauthenticated-route-mixin';

export default Ember.Route.extend(UnauthenticatedRouteMixin,{
    model() {
      return this.store.createRecord('user');
    },
    resetController(controller,isExiting)
    {
        if(isExiting){
            controller.get('model').rollbackAttributes();
            controller.set('errorMessage', '');
        }
    }
});
Handle registration attempts in the register controller: app/controllers/register.js
# Create the register controller
ember g controller register
import Ember from 'ember';

export default Ember.Controller.extend({
    session: Ember.inject.service(),
    registered: false,
    actions: {
        register(){
            let self = this;
            this.get('model').save().then(()=>{
                self.set('registered',1);
            }).catch((error)=>{
                this.set('errorMessage',"Registration failed.");
            });
        }
    }
});
Setup Complete
That concludes the setup for the project. You have working logins and registration, a JSON API with authenticated routes and an Ember application ready for your custom code.
Deployments
You might have noticed that during the Laravel setup we setup a catchall route that returns an index view but we didn’t actually create the view. This is because it’s not required during development – we use Ember serve to load our Ember application instead.
Once you’re ready to deploy your project to production or staging you’ll need to build the Ember application and copy across the files into the Laravel public directory. I’ve created a simple script that I use for staging (and a similar script for production deployments). The idea is to have a production branch in the Git repo which is deployed on the server.
You can use the script below and modify it to suit your needs:
# create the publish-staging script
touch publish-staging.sh
# make the publish script executable
chmod a+x publish-staging.sh
Set the contents of the publish script publish-staging.sh
#!/usr/bin/env bash

# PUBLISH STAGING

# make sure we're in the master branch
git checkout master
git add .
git commit -a -m "Pre-publish commit"
git push
# switch to staging branch
git checkout staging
# merge master into staging
git merge master
# build the Ember application
cd frontend && ember build --environment staging && cd ..;
# clear public
rm -Rf backend/public/assets;
rm -Rf backend/public/fonts;
rm -Rf backend/public/index.html;
rm -Rf backend/public/crossdomain.xml;
# copy the new Ember build into the Laravel application
cp -R frontend/dist/assets backend/public
cp -R frontend/dist/fonts backend/public
cp -R frontend/dist/index.html backend/resources/views/index.blade.php
cp -R frontend/dist/crossdomain.xml backend/public
# git commit
git add .
git commit -a -m "Fresh Staging build"
git push origin staging

# switch back to master
git checkout master
This publish script goes in the project root and just make sure you stop your ember server before running it to prevent conflicts. The other thing to be aware of is uncommitted changes – as you can see the script above will switch to master and commit all uncommitted changes, which will cause problems if you’re currently working on a feature branch with uncommitted changes.
Summary
That’s a pretty full on guide to setting up a project that uses a Laravel backend and Ember as the frontend. Once complete you can get on with the meat and bones of the application.
Code Availability
You can find the files created and used within this application in my laravel-ember-starter project repo. If you like I can make the whole sample app available on Github so that you can have everything served to you without having to work through all the steps yourself. I’m reluctant to do this upfront as there’s a lot going on in the tutorial and I’d advise you to read through and understand what’s going on and make any neccessary changes as you see fit.
Feel free to leave comments and suggestions for improvements in the discussion area below.
Many thanks for posting this, it’s much along the lines of what I want to achieve. However, after following the steps my endpoints do not produce responses that adhere to the JSON-API spec? Nothing is transforming the response?
[…] is powerful and allows for truly scalable PHP/MySQL web applications. You might also enjoy this guide if you’re completely new to the Laravel/Ember setup […]
Great Tutorial on Ember.js and Laravel /DingoAPI implementation.
Helped me alot with my Laravel/DingoAPI backend and Emberjs Frontend project.
more tutorials on this will be helpful.
Will surely comment back with suggestions for improvements and tips.
Keep up the good work.